Accelerate deployment with Yet Another Quick Start
Azure SQL MI pre-requisites
Azure SQL Managed Instance (MI) is a Platform as a Service (PaaS) that lives in Vnet, inside a subnet and is assigned IP addresses from the private IP address space.
Even though private IPs are abundant and free, you will need to work with your networking team to determine what CIDR block(s) to use in your Cloud Virtual Networks (Vnets), in order to avoid conflict with peered Vnets, as well as other on premises networks that you would potentially connect to via VPN, or through a direct connection with ExpressRoute.
Azure SQL MI requires a dedicated subnet, with a Network Security Group that opens ports necessary for Azure to manage your servers as you would expect from a PaaS (Platform as a Service).
Depending on how many instances you will create now and in the future, make sure your subnet has enough IP addresses. The recommended minimum is 32 IP addresses, but always plan for growth, especially that in software defined networking, you don’t have to worry about broadcast domains.
Since your Azure SQL MI lives in private IP address space, you will need to connect to it somehow. You have several options:
- Connect to your Azure SQL MI by creating a public endpoint and adding a rule to your NSG to enable access.
- Create a public subnet in your Vnet by creating a route to the internet, Create a bastion host which will host your SSMS, and RDP to the host whenever you need to access your SQL MI with SSMS. Your subnet hosting the “jump box/bastion host/windows VM” will have a system route or a custom route to enable network communication.
- Connect through a site to site VPN, a point to site VPN, or an Azure ExpressRoute.
Connect to your instance
Once you have established your network, and the method of connecting to your Azure SQL MI, you will be back in familiar grounds, using your favorite client to connect to your Database Management System (DBMS). However, most likely your SQL Server Management Studio (SSMS) client needs an update, so make sure to upgrade it to the latest version.
Azure SQL MI supports regular SQL authentication, and Azure active directory.
Before you get stuck on this, remember to include the port number to your server name in SSMS. Also, if you are using a public endpoint, your server name will be different then if you are using a private endpoint. Here I am using a public endpoint:
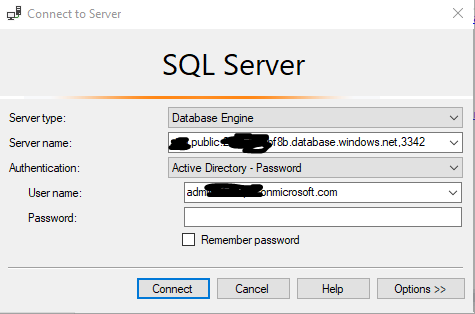
Addresses and connection strings are available in the portal under Azure SQL MI> Settings > Connection strings:

When you created your instance, you would have defined your SA user and password, which you will need to connect to your instance for the first time. If you forgot your SA password, you could reset it in the portal here:

Once you are connected, you can decide to integrate with your Azure Active Directory, which you could sync with your on-premises directory. Work with your AD admin to accomplish that.
To assign AD users and groups access to your instance, follow these steps:
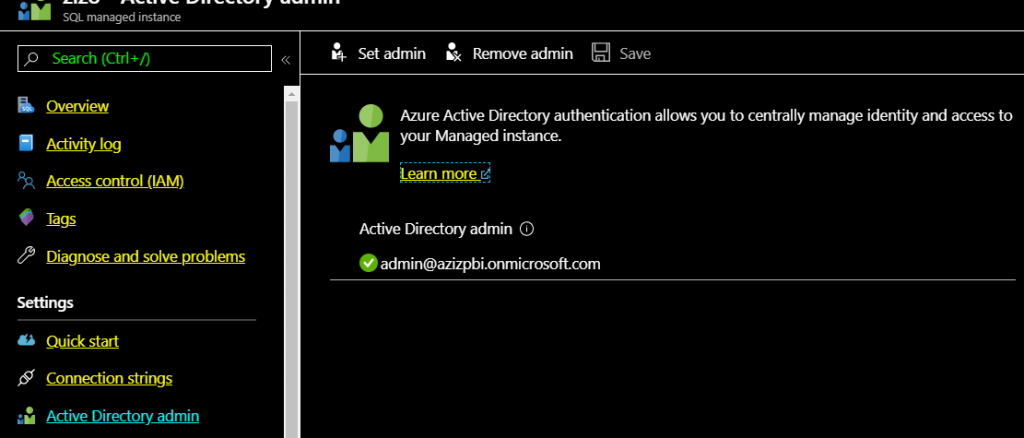
- Add an Active Directory User as an admin to your instance.
- Go back to your SSMS, log in as System Admin (SA), and run the following scripts:
- Add your Azure AD login by running this command:
 USE master
 GO
 CREATE LOGIN [nativeuser@aadsqlmi.onmicrosoft.com] FROM EXTERNAL PROVIDER
GO - If you want the AAD user to create other AAD Users/Groups, he needs to be part of the sysadmin group.
- Run this while still logged in with the SQL user:
ALTER SERVER ROLE sysadmin
ADD MEMBER [nativeuser@aadsqlmi.onmicrosoft.com] - To create a contained DB User:
Use databasename
 CREATE USER [User or Group] FROM EXTERNAL PROVIDER;
The contained Database Azure AD User or Group is set at the database level and doesn’t require them to be added as a Login in the Master Database.
You can now logout and log back in to SSMS with your azure AD user, and start creating contained AD users and groups, or other AD logins as needed.
Restore a database backup to your cloud instance
Next, you can create new databases, or restore an existing backup.
The easiest way to restore a backup is to create a storage account, upload your backup to it, and do a restore from URL.
First, Create a storage account in Azure portal. While you are there click on Access control and assign a role to the AD user or group who will need access to the storage account. It’s better to give them contributor access, so they can write to the storage account aka upload the backup file, then read from it.
Next, download Storage Explorer, to access the storage account, and upload your “.bak “ backup file.
To Authenticate Azure SQL Managed instance to Azure blob storage (App authenticating to a service), you will need to create a credential that uses a SAS token. You can either do it through the portal, or through storage explorer.
Let’s generate one with Azure portal:
- In your storage account, under settings, click on Shared access Signature (SaS).
- Pick the Allowed services (We will be using Blob), allowed resource types, and allowed permissions.
- Set the start and expiry date/time
- Leave everything else as default, and click “generate SAS and connecting string”
- Copy your SAS token and save it, as will need it to access your storage account from SSMS.
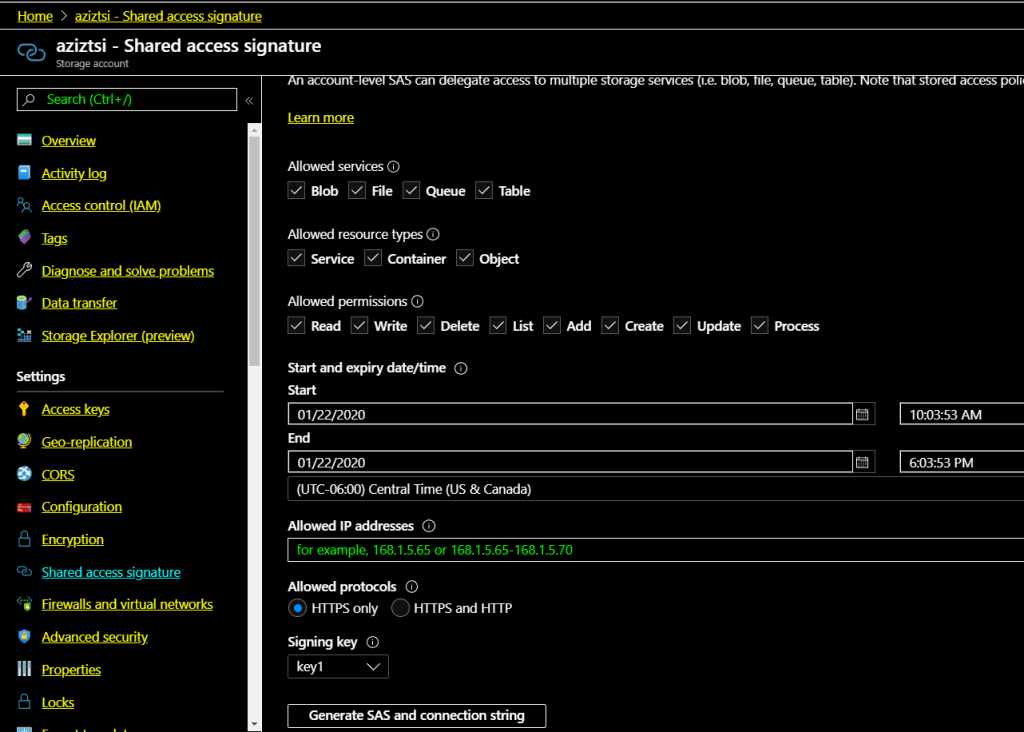
In SSMS, click on new query and run this script:
Create CREDENTIAL [https://StorageAccountName.blob.core.windows.net/containerName]
WITH IDENTITY = 'SHARED ACCESS SIGNATURE'
, SECRET = 'sv=2019-02-02&ss=bfqt&srt=sco&sp=rwcup&se=2020-0126T03:28:16Z&st=2020-01-01T19:28:16Z&spr=https&sig=67BYQfoaZ7xDMhBUEqvYtwJK6WGOrG7nBagCtQ%3D'
If it worked, you should see an entry under Security> Credentials:
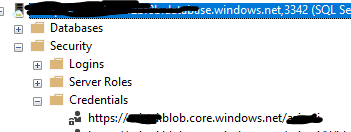
I have noticed that when you generate the SAS token, it start with a “?” mark, go ahead and remove it as I did in the script above. The question mark is a remnant of the Blob service SAS URL, so it’s not part of the “secret”.
Run this script to check if you can access your storage account now that you have added the credential:
RESTORE FILELISTONLY FROM URL = 'https://StorageAccountName.blob.core.windows.net/ContainerName/WideWorldImporters-Standard.bak'
You should get a result set like the following:

If your backup file has an in memory file group, then you will need to make sure that your Azure SQL MI is “Business Critical” instead of “General Purpose”.

Or you will get this error when attempting to restore it:
Msg 41915, Level 16, State 1, Line 13
Memory-optimized filegroup must be empty in order to be restored on General Purpose tier of SQL Database Managed Instance.
Msg 3013, Level 16, State 1, Line 13
RESTORE DATABASE is terminating abnormally.
Finally, to restore the database, run this script:
RESTORE DATABASE [YourDatabseName]
 FROM URL =  'https://StorageAccount.blob.core.windows.net/StorageContainer/WideWorldImporters-Standard.bak'
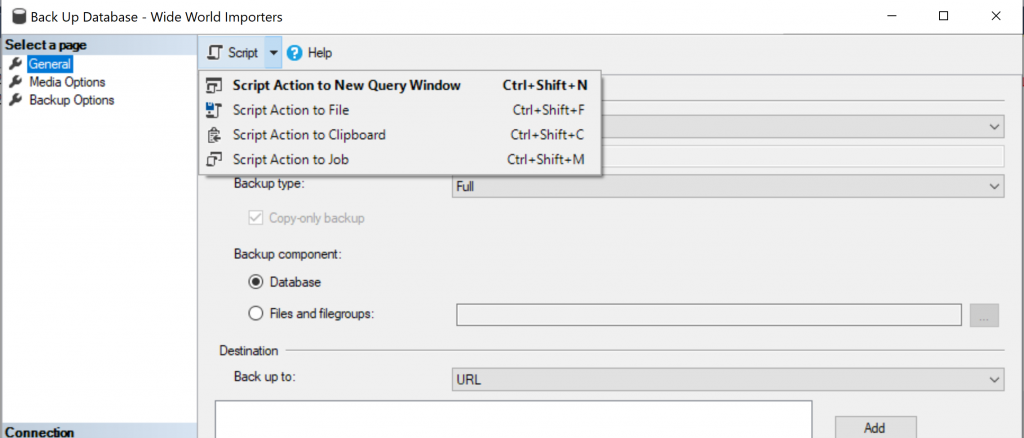
Backups
Short term backup retention can be configured independently for each database in Managed Instance and up to 35 days.

Longer term copy only backup can be configured to run independently via a SQL agent job.
Optimize cost
When you decide to stick with Azure SQL Managed instance, you can optimize cost by:
- Using an existing SQL Server license and taking advantage of Azure SQL hybrid benefits.
- Reserving capacity for 1 to 3 years to get discount on compute.
- Using instance pools to consolidate smaller instances into a pool of resources. (Currently in preview, and can be configured only by Power Shell)
